Stuff4FS - Don's Developer Utilities
Edge Lights Processor V.1.0.0
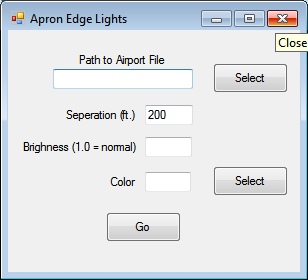
The default spacing for apron edge lights in both FS9 and FSX is 200 ft. A light is placed at the beginning of the string and at 200' intervals after that, regardless of the length of the string. This means that if a string of edge lights is 450' ft. long, the last light in the string is only 50' from the end. There is no facility available to the user to adjust this spacing.
Edge Lights Processor will "massage" the airport .bgl file output by the FS9 or FSX compiler by calculating the length of the string and space the lights evenly along the string. You may specify a nominal separation - which, in fact, is the maximum spacing used by Edge Lights Processor. You may also adjust the color of the lights.
To use Edge Lights Processor
- start Edge Lights Processor.exe
- specify the path to the airport .bgl file, either directly or using the Select button
- edit the (maximum) separation and brightness fields as necessary
- specify a different color if required (a color dialog will appear when you click the Select button associated with this field
- click Go
You will either receive an explanatory error message is there are problems, or confirmation of successful completion of the process - in which case the airport .bgl file is ready to use.
Download this utility...
Extract FS9 Airport XML V.1.0.4
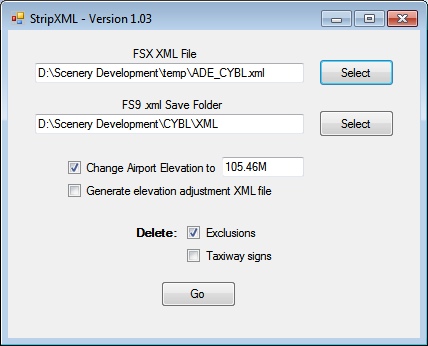
StripXML is a utility that may be useful to airport designers who create airports for use with both FS9 and FSX. It examines an XML file that contains data for an airport - and which may also include scenery objects - and:
- strips-out or replaces airport features and syntax that are not compatible with FS9, and
- converts Guids in scenery objects to FS9 format
- changes airport elevation and generates the XML for an elevation adjustment file to be placed in Scenery\World\scenery
ADE handles both FS9 and FSX airports. However, (for good reason) ADE requires you to maintain the FS9 and FSX versions separately. Other airport design applications may do the same. (If the FS9 and FSX stock airports use similarly-placed default buildings and you don't need FSX-only features or library objects, you can probably use the FS9 version also for FSX.)
StripXML allows you to generate a FS9-compatible airport from the XML version of a FSX airport created with ADE or any other airport design application - with certain limitations. These limitations have to do mainly with the differences between FS9 and FSX stock airports. For example, when ADE converts a stock airport, it excludes and then regenerates certain features, such as default buildings (which you may replace) and taxiway signs. FSX default building excludes are unlikely to apply to FS9 and vice versa. Also, you may or may not wish to keep the stock taxiway signs. So, StripXML allows you optionally to omit the FSX exclusion rectangles and taxiway signs when it creates your FS9 airport from the FSX XML.
Generally, your FS9 and FSX airports will be at the same elevation. But, depending on the mesh, there may be instances where this doesn't work. A case in point is CYBL. The FS9 and FSX meshes around Campbell River are very different. The FS9 mesh is quite flat and the elevation assigned to the stock airport and associated flattens works nicely. Not so with FSX. In PNW, Orbx dropped the ARP by nearly 15m. - which I adopted for my FSX CYBL. So, when I stripped the FS9 XML from the ADE FSX code, I had to adjust the airport elevation back to that of the FS9 stock-airport. Since I was reverting to the stock airport elevation, I didn't need an elevation adjustment file in Scenery\World\scenery. But had I needed it, StripXML would have created the XML from which that file could have been generated.
To use StripXML, start StripXML.exe and enter the path to the FSX XML file and the folder where you want the FS9 XML file to be saved - either directly into the applicable text boxes or using the corresponding Select buttons. Enter a new elevation if necessary, check the necessary Delete checkboxes and click the Go button. Successful conversion will be confirmed with a "no errors" message. (Any errors encountered will, of course, be reported.) The FS9 XML file will be named as the FSX file but with the suffix "_FS9".
To ensure you don't inadvertently keep FSX default building (or other) exclusions, if you don't call for their deletion, instead of the confirmation message, StripXML will warn you that it encountered exclusion rectangles. If you intended to leave them, you're done. If not, you can re-run StripXML with Delete: Exclusions checked.
The last step is to compile the FS9 XML file and, if required, the elevation adjustment file. Do so as you would with any other scenery file.
StripXML will "remember" your settings from one session to the next.
Download this utility...
List Mdl V.1.0.1
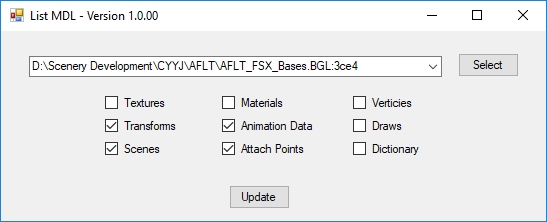
List Mdl is a small utility that creates a plain-English listing of Microsoft Flight Simulator (FS8/2000 and all subsequent versions) and Lockheed Martin Prepar3D (all versions), collectively FlightSim, scenery and aircraft models. The model data may be in either standalone *.mdl files or collected in *.bgl files. List Mdl will be of interest to to scenery or aircraft developers and anyone else who manipulates ".mdl" files.
Click on the Select button, browse to the file of interest and select it. If the selected file type is *.bgl you will be presented with a list of the models included in the file. Select the one you want. If the selected file type is *.mdl, the listing will be presented immediately.
List MDL maintains a record of the last 10 models accessed. If the model of interest has been accessed recently, click at the right end of the combobox and select it from that list. (Models in .bgl files are displayed as the file path suffixed with the hex offset of the model in the file.) Then click the Update button.
The listing presented will fully detail the sections checked on the panel. Only a summary of the other sections will be included. Select or deselect sections as necessary. The listing will be updated without further user input.
Download this utility...
GUID and Name Processor V.1.0.0
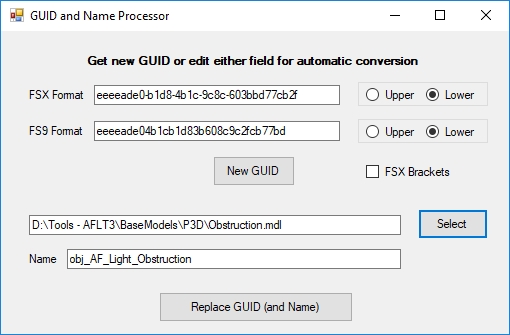
GUID and Name Processor is a small utility to create new guids and that also allows users to examine and change the guid and/or "friendly name" included in scenery or aircraft.mdl files for Microsoft Flight Simulator X and all versions of Lockheed Martin's Prepar3D.
GUID and Name Processor will be of interest to scenery or aircraft developers and anyone else who manipulates ".mdl" files.
To create a new guid, click the New GUID button. The guid will be displayed in both FS9 and FSX formats.
Paste a guid into either the FS9 Format or FSX Format (as applicable) text box. The guid in the alternate format will be displayed automatically in the other text box.
Guids may be display in either upper or lower case and, in the case of the FSX format, with or without brackets, on command. Either guid in the displayed form myy be copied to the Windows clipboard.
You may view the guid and friendly name assigned to a FSX or P3D "*.mdl" file by clicking on the Select button, browsing to the file of interest and selecting it, or by entering the path of the file directly into the associated text box.
To change the friendly name and/or guid of a FSX or P3D "*.mdl" file:
- edit the name in the Name textbox, and/or
- click the New GUID button or paste the desired guid into the FSX Format text box
and click the Replace GUID (and Name) button.
Download this utility...
Image2PhotoReal V.1.0.2
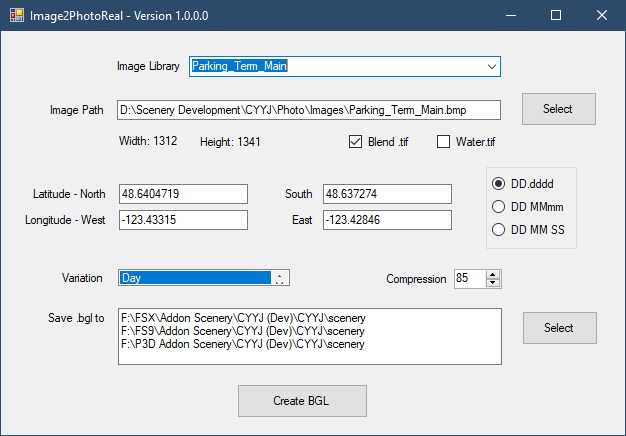
Have you ever had an aerial image (ortho-image) of a part or all of your real-life airport or nearby area that you knew would add a good deal of realism to your airport if only there were a way to include it? Well, it has always been possible. But, the task was very tedious and sometimes frustrating.
Not any more! Image2PhotroReal to the rescue!
Image2PhotoReal is a small NET Framework 4.5 application that requires you only to supply the ortho-image and any necessary masks, and accurately locate the real-world position of its/their upper-left and lower-right corners. Image2PhotoReal does the rest!
It:
- automatically locates any mask files,
- processes the image,
- generates a mesh-following .BGL file that can be used with Microsoft Flight Simulator versions FS9 and FSX and all versions of Lockheed Martin Prepar 3D.
Download this utility...
MipMap Manager V.0.0.6
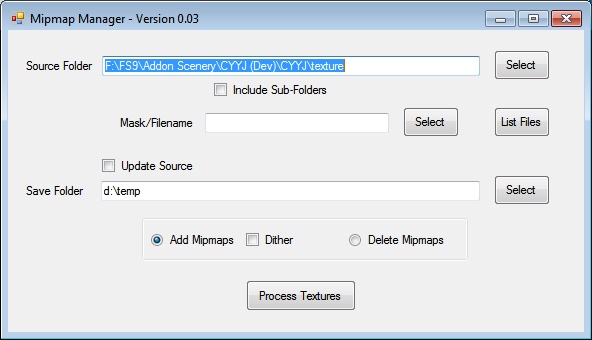
Mipmap Manager is a utility to add or remove mipmaps from a set of textures. It uses Martin Wright's mwgfx.dll and mwdll.dll, which are the same .dlls required by DXTbmp and other of Martin's utilities. (If you have not previously installed these DLLs, you may obtain them free of charge from Martin's web page.) Thanks to Martin both for creating the .dlls and making available the development information to me.
The operation of Mipmap Manager is straightforward. Start MipmapManager.exe. Specify the source folder (i.e., the folder where the textures to be processed reside), either check Update Source or specify a destination folder, indicate whether mipmaps are to be added or deleted and click Process Textures. If you wish to process only a single file or a subset of the files in the source folder, also specify a mask (using standard Windows® wildcard characters) to define the file(s) of interest.
Download this utility...
Separation Plane Calculator V.1.0.0
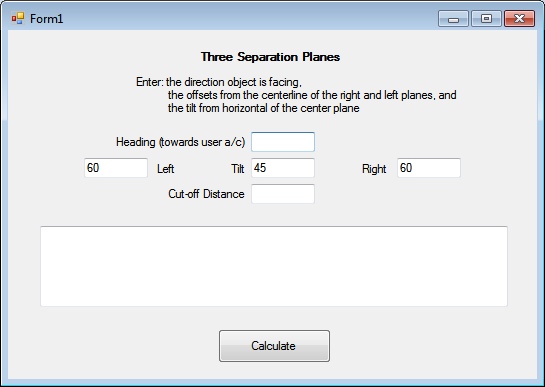
The programming of hold-short "wigwags", PAPIs, VASIs, threshold lights and many other simulated airfield facilities requires the use of assembly language Separation Planes. The parameters of separation planes are rather nebulous quantities the calculation of which is complex and involves trigonomnetry. Separation Plane Calculator generates the .asm code for up to three separation planes used in combination. (If you need help designing "wig-wags", PAPIs, etc., tutorials are available at fsDeveloper.com and elsewhere.)
To use Separation Plane Calculator, start SeparationPlanes.exe. Enter the direction that the object faces - which, generally, will be towards the user aircraft when you want the object to be active. Then, enter the orientation of the separation planes. There may be one, two or three planes. The illustration above shows three planes, one on each side allowing the object to be seen at angles of up to 60 degrees, with a tilted plane limiting visibility to elevations forming less than a 45 degree angle with the object.
For threshold lights, there likely will be only one plane required and it probably will be vertical. The heading will be the reciprocal of the runway heading (true) and the tilt - measured from the horizontal - will be 90 (degrees) or some relatively high angle.
For a "wigwag", where the lights are usually hooded and, therefore, visible only within a certain angle from the front, you would enter in the left and right fields that angle (again, in degrees). Should you want to limit the visibility from above, you may wish to add a third tilted plane.
A PAPI or VASI will have several tilted planes. You will have to calculate the code for the additional planes individually as single plane objects.
Finally, if you wish to limit the visibility of the object/lights by distance, enter that distance, in meters, into the Cut-off Distance field.
Click the Calculate button. The .asm code for the separation planes will appear in the large text box. You can paste the code into your .asm file.
Download this utility...
SlewMaster V.1.0.2
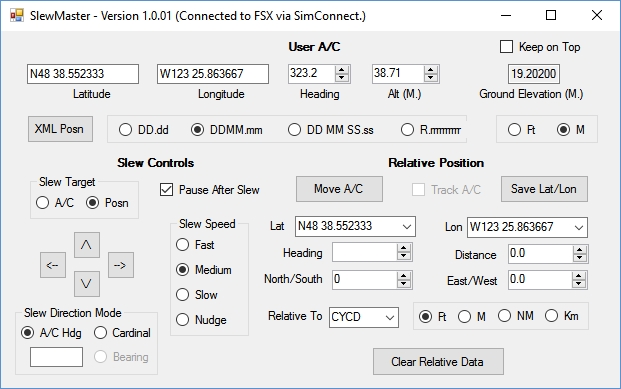
SlewMaster is a small (in memory size) utility that is able to:
- slew the Microsoft Flight Simulator user aircraft - both in FS9 and FSX - in every way possible,
- measure distances to/from the user aircraft, and
- convert between the various lat/lon formats
SlewMaster was inspired by Richard Ludowise's TCalc 2004 and TCalc for FSX which I used extensively in my scenery development efforts. Thanks Dick..
Download this utility...
Texture Manager V.2.1.3
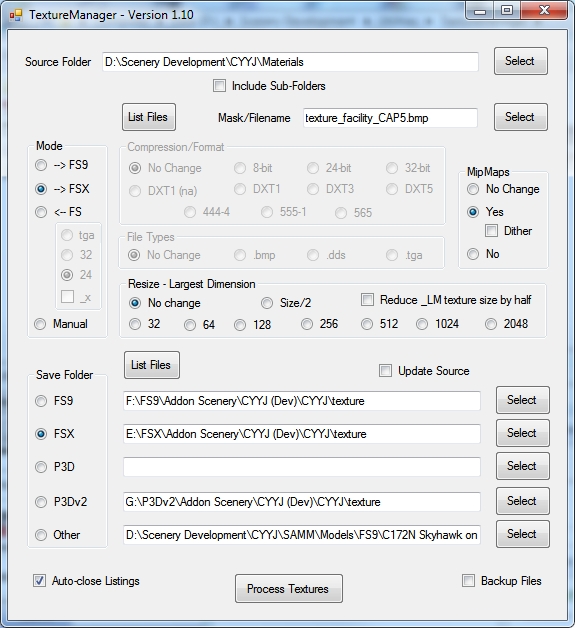
Texture Manager ("TM") is a utility for converting compressed and uncompressed image files between formats used for, or as a source for, Microsoft Flight Simulator scenery textures. The conversion medium is Martin Wright's mwgfx.dll and mwdll.dll, which are the same .dlls required by DXTbmp and other of Martin's utilities. (If you have not previously installed these DLLs, you may obtain them free of charge from Martin's web page.) Thanks to Martin both for creating the .dlls and making available the development information to me.
Texture Manager will convert a single file, all the files in a folder and its subfolders, and many steps in between. It processes both standard Windows® .bmp files and .tga files. Compressed texture files may be converted back to their Windows® 24-bit equivalent (though such conversions may result in a reduction in image quality). As well, among other things, you may resize textures, add or eliminate mipmaps or list files showing their format, mipmap status, etc.
As stated elsewhere, all my airport scenery developments are for both FS9 and FSX. Before TM, when I created or modified a texture, I had to convert it twice - a compressed .bmp for FS9 and a compressed .dds for FSX, inverting the image for the latter. If there was an _LM version of the texture, that was two more conversions. And, if the texture had a alpha channel, that added a couple more steps in each conversion. With Texture Manager and appropriately named source image files, all I need do is "point" to the folder containing the source files, check the version of Flightsim of interest and click the Process Textures button. TM does the rest. If certain files in the folder need special processing, Texture Manager can accommodate this wirh the use of small "control" files.
Download this utility...
Tweak FS2002 Ground Poly V.1.0.5
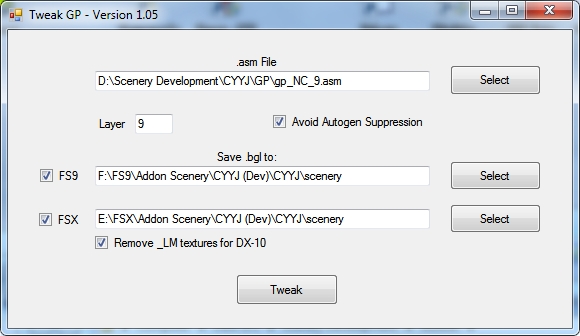
Many designers use FS2002 ground polys in their FS9 and FSX scenery. But, the .asm files generated by FS2002 MakeMdl require some "tweaking" (modifying one instruction and removing another) to avoid flickering when placed over, for example, airport aprons. As well, like any other models, autogen is suppressed within the bounding box of the ground poly. However, in the case of FS2002 gound polys, the bounding box is defined by the latitude and longitude extremes and, hence, may be much larger and oriented differently than the area covered by the ground polys. Version 1.05 further "tweaks" the .asm file to avoid autogen suppression. As well, if you select DX-10 processing, Version 1.05 deletes the night texture definitions which were the cause of ground poly textures not being displayed in FSX DX-10 Preview mode during dusk, night and dawn.
While this tweaking is a simple task, if you use ground polys to display, for example, apron markings (as I do), that task often has to be done numerous times.
TweakGP reduces that task to a single mouse click once the affected file and folder(s) have been selected.
Tweak GP includes a short user manual. But here's how to use it:
- start TweakGP.exe
- enter the path to the .asm file (not the _0.asm file) generated by MakeMdl - either directly or using the Select button/li>
- enter the layer number for the ground poly
- enter the path to the folder(s) in which you want the .bgl file (named as the .asm file) to be saved - either directly or using the Select buttons
- check either or both FS9 and FSX/li>
- click the Tweak button.
Tweak Ground Poly "remembers" the most recent settings.
Download this utility...
Tutorial Drive-Through Parking
Don's Drive-Through Parking tutorial
Download this tutorial...
Tutorial Adding Realism to Airports
Don's Tutorial how to add realism to your airport
Download this tutorial...
This page was last modified on Sunday, 10 September 2023 - 23:58